Campervan Electrics UK — A Beginner Friendly Guide to Powering Your Van Properly
- VanLife.uk

- 2 days ago
- 4 min read
Updated: 15 hours ago
How to Design a Safe and Practical Campervan Electrical System for Real UK Vanlife

Campervan electrics can feel intimidating at first. Batteries, solar panels, chargers and wiring diagrams often look complicated, especially if you’re new to van conversions. The good news is that most UK campervan electrical systems follow the same basic principles, and once you understand how power flows through your van, everything starts to make sense.
This guide breaks down campervan electrics in simple terms, explaining what you actually need, what you don’t and how to design a system that supports your layout, travel style and everyday use on British roads.
Quick Answer — What Do You Need for Campervan Electrics in the UK?
Most beginner-friendly electrical setups include:
Leisure battery system
Split charge or DC-DC charger
Solar panel (optional but popular in the UK)
12V lighting and USB outlets
Basic fuse protection
You don’t need a complex off-grid setup to enjoy vanlife. Many UK builders start with a simple electrical system and upgrade later as their travel style evolves.

Why Campervan Electrics Matter More Than Fancy Interiors
It’s easy to focus on beds, kitchens and styling, but electrics determine how comfortable your van feels day to day.
A well-designed system allows you to:
Charge phones and laptops
Run lighting during darker UK evenings
Power small appliances
Stay off-grid longer without campsite hookups
Poor electrical planning can lead to dead batteries, unsafe wiring and constant frustration.
If you’re still designing your interior, our campervan layout design UK guide explains how to plan electrical routes before building furniture.
Step 1 — Understanding the Basics of Campervan Power
Campervan electrics usually revolve around two systems:
12V System
This powers:
Lights
Fans
USB sockets
Water pumps
Most UK builds rely heavily on 12V because it’s efficient and safe.
230V Hookup System
Some vans include mains hookup for campsites.
Common uses:
Charging larger devices
Running kettles or heaters
Shore power when parked
Not every van needs a full 230V system, many UK travellers keep things simple.
Step 2 — Choosing the Right Leisure Battery
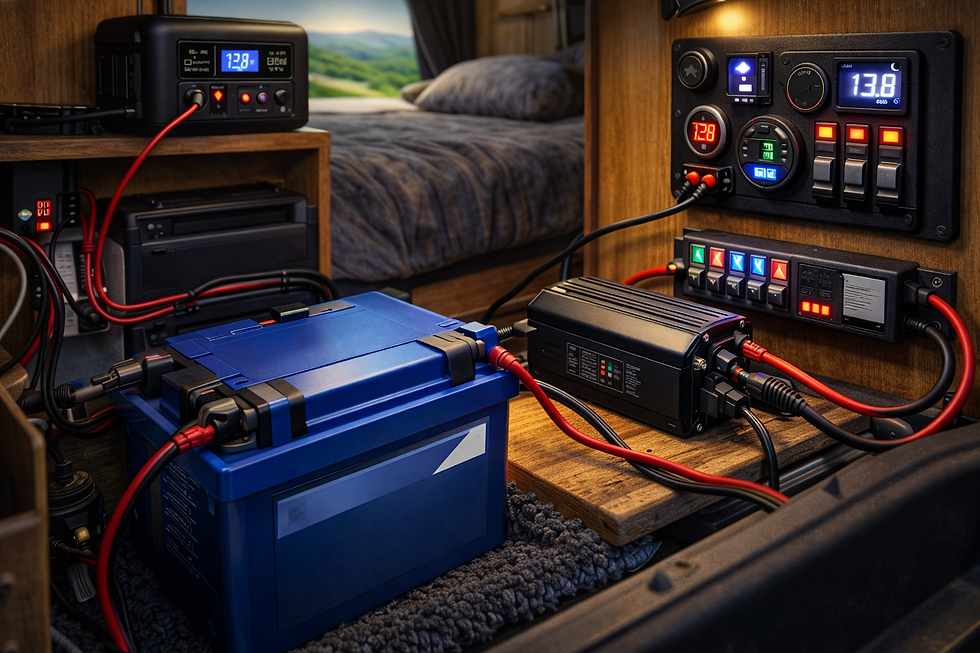
Your leisure battery stores energy for everything inside the van.
Common types used in the UK:
AGM batteries (budget-friendly)
Gel batteries (less common but reliable)
Battery size depends on how often you travel and what you plan to power.
If you’re still deciding on a base vehicle, our guide to the best vans to convert into a campervan in the UK explains how van size affects electrical space and payload.
Water pumps rely on your electrical system, so it's worth understanding how a campervan water system UK setup works alongside your electrics.
Step 3 — Charging Your Campervan Battery
There are three main ways UK vanlifers keep batteries charged.
Split Charge or DC-DC Charging
Charges the leisure battery while driving.
Benefits:
Reliable during road trips
Works well in cloudy UK weather
Many UK builders choose a reliable DC-DC charger to protect their vehicle electrics and charge efficiently while driving.
Solar Panels

Solar setups using quality campervan solar panels are popular but should be matched to realistic expectations..
Pros:
Free energy when parked
Ideal for summer travel
Cons:
Less efficient during winter or cloudy weeks
Mains Hookup Charging
Useful for campsite stays or home charging.
Many UK converters install a basic charger rather than a complex mains system.
Step 4 — Campervan Electrics UK Safety Basics
Safety should always come before convenience.
Important considerations:
Use proper fuse protection with a dedicated campervan fuse box
Secure cables away from sharp metal edges
Avoid overloading circuits
Plan ventilation around batteries
A simple, well-installed system is safer than an overcomplicated one.
Step 5 — Wiring Layout and Planning
Electrical design should happen before insulation and wall panels go in.
Key tips:
Plan cable runs along structural ribs
Label wires during installation
Leave access points for future upgrades
If you haven’t insulated yet, our campervan insulation UK guide explains how insulation choices affect wiring access and airflow.
Step 6 — How Your Bed and Layout Choice Affects Electrics
Different sleeping setups influence electrical planning.
Fixed beds often hide batteries underneath, while rock and roll layouts may place electrics in side cabinets.
If you’re still choosing between sleeping setups, our fixed bed vs rock and roll bed campervan UK guide explains how layout decisions impact interior design and storage.
Real UK Vanlife Electrical Tips Most Beginners Miss
Install more USB ports than you think you need, especially fast-charge USB sockets designed for campervans
Use warm lighting to create a cosy atmosphere
Keep electrical panels easy to access
Plan space for future upgrades
Small design choices make your electrical system easier to maintain long term.
How Electrics Fit Into the Bigger Campervan Build
Campervan electrics connect with every other part of your conversion:
Van size affects battery placement
Layout design determines cable routes
Insulation influences ventilation and heat management
If you’re working on a budget build, our guide to the cheapest vans to convert into campervans UK shows which vans make simpler electrical installs easier.

Final Thoughts — Keep Campervan Electrics Simple and Practical
You don’t need an advanced electrical background to build a reliable campervan power system. Start with a simple setup that supports your travel needs, focus on safety and leave room to upgrade as your vanlife experience grows.
Explore more UK-specific guides on VanLife.uk to plan your layout, choose the right van and design a camper conversion that feels comfortable wherever you travel.